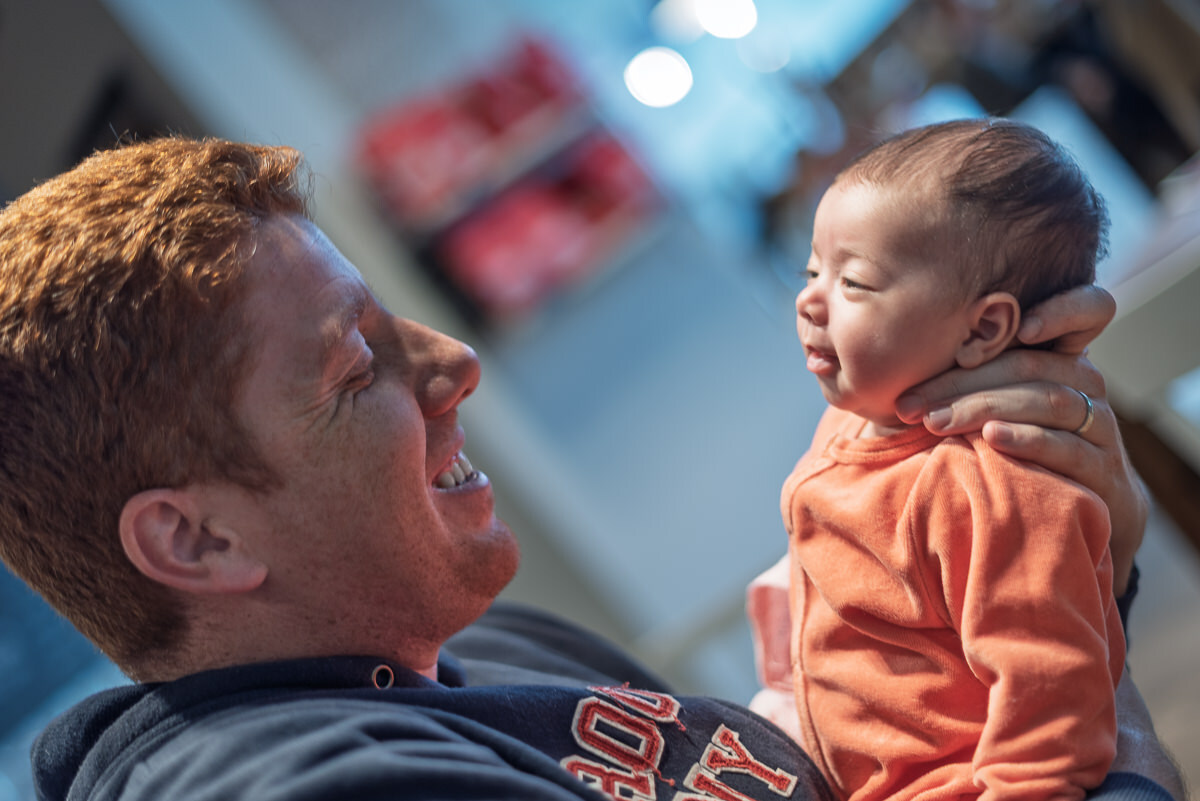
As the days get shorter and the November weather keeps us inside, it’s the perfect time to turn our homes into our personal photo studios! Don’t let the lack of sunshine dampen your photographic spirit. With a few simple tricks and perhaps a couple of affordable tools, you can capture beautiful, well-lit photos right in your own living space.
Here are 3 practical tips to help you take stunning indoor photos:
Tip #1: Use your windows as your main light source

During the day, large windows are the best light source with soft, diffused light. Position your subject near a window, but out of direct sunlight (if there is any!). Switch off other lights to avoid color casts. Observe how the light falls in different rooms throughout the day to find your best window.
Tip #2: Open Up Your Aperture

To make your subject truly pop against a softly blurred background (known as “bokeh”), use a wider aperture (smaller f-number like f/1.8 or f/2.8). This will not only isolate your subjects from a distracting background, it will also let in plenty of light so that you don’t have to use very high ISO’s and get clean shots. This is why we recommend a prime lens (e.g. 50mm f/1.8) much more than a kit lens like 18-55. These lenses are very affordable and will get you game-changing results.
Tip #3: Create soft light with a lamp or flash by bouncing from your walls

During the evenings, the ceiling lights are not your friend 🙂 They will create shadows in the eyes and highlights at the top of the head. The built-in “pop-up” flash is also not flattering, it will create harsh, unflattering shadows. The secret is to “bounce” the light. Get a simple external speedlight (flash) that fits your camera hot shoe. Instead of pointing it at your subject, rotate the head to point at a white ceiling or a wall behind you. The light will bounce off the surface and come down as soft, diffused light that looks professional and natural.
Bonus tip: Use auto ISO & Aperture Priority mode
Many photographers are afraid to raise their ISO because they fear “grainy” photos. However, in low-light indoor situations, a low ISO often forces your camera to use a slow shutter speed, resulting in motion blur. Remember: A sharp, grainy photo is always better than a smooth, blurry one. Use the combination of Aperture Priority Mode and Auto ISO. Select the lowest Aperture your lens allows. This will reduce speed and increase ISO as needed, so that you can concentrate on the light and composition, which is the most important element in your photo.
Learn more photography tips
If you’re ready to master your camera, we’re here to help. Join one of our photography courses for all levels and see how fun it is to explore your creative side.


